Whenever you connect to a WiFi network, that network will be remembered and your Mac will automatically want to connect to that network again if the network is available and whenever you are in its vicinity.
This is fine when you come home and you want it to automatically connect to your home WiFi, and the same when you arrive at the office at work. But what if you don't want it to automatically connect to a network? What if you're in an area where there are lots of open WiFi networks and you don't want to accidentally join one of them?
Well in this post I'll show you a couple of tricks that you can use to stop this from happening. It's very easy to do, but it's not obvious to all.
The first method explains how to forget a WiFi network on a Mac which will prevent your Mac from ever rejoining that network again automatically.
The second method doesn't forget the WiFi network but allows you to prioritize a particular WiFi network to that you don't end up joining a unsecured network.
Security is another good reason for forgetting certain networks and prioritizing the networks that you trust.
If you're wary about public WiFi networks (and rightly so), check out this post so that you know what to look out for.
Ready? OK cool, here we go:
What You Will Learn
- How to forget a WiFi network by removing it from the preferred networks list in Mac OS X
- How to prioritize wireless networks in Mac OS X
How to forget a WiFi network by removing it from the preferred networks list in Mac OS X
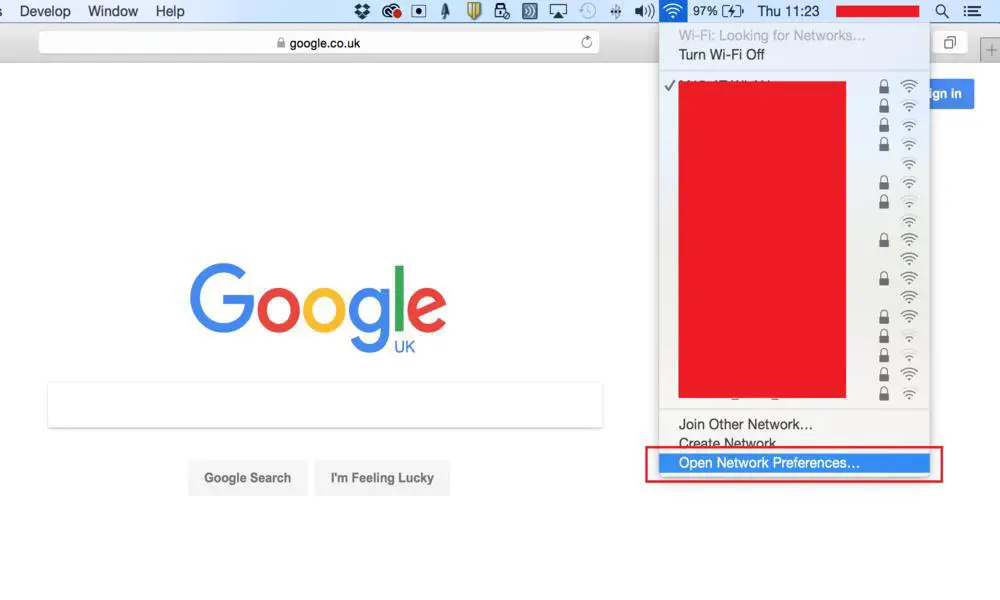
Step #1 – Open Network Preferences
The first thing you need to do is click on the WiFi symbol on the top menu bar and click on Open Network Preferences at the bottom of the drop down menu.
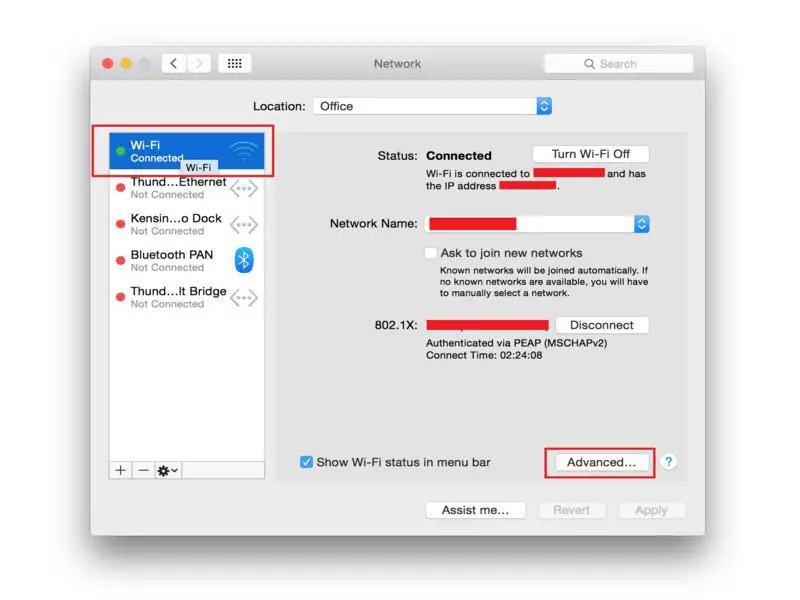
Step #2 – Select WiFi in the network panel
In the network panel that pops up, select WiFi from the menu on the left and then click on the Advanced button at the bottom right of the window.
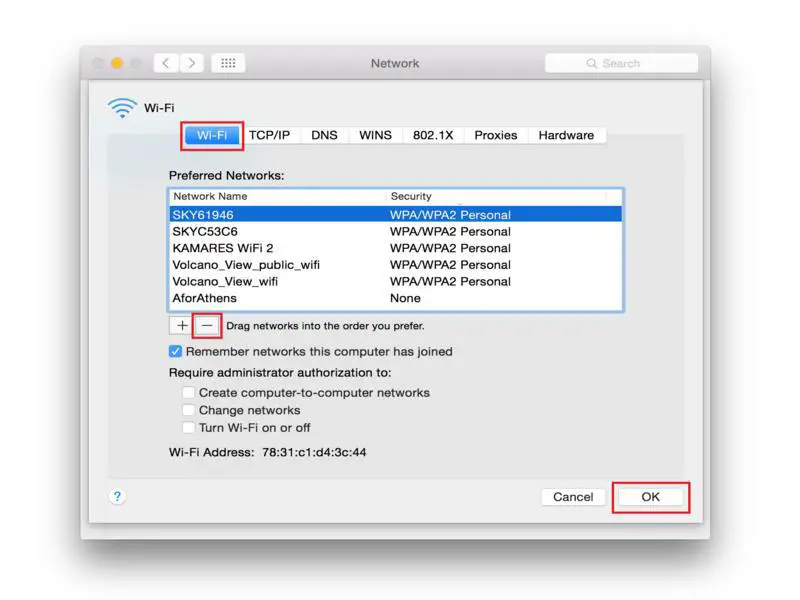
Step #3 – Select the WiFi network you wish to delete
First, ensure that the Wi-Fi tab is selected and then select the network that you wish to delete/forget and click on the minus sign (see image below).
Step #4 - Confirm WiFi removal
Once you have removed the WiFi network, depending on which version of Mac OS you have, you may have to confirm that you still wish to remove the network by clicking Remove.
I'm using an older version of Mac OS (Mac OS Yosemite) so you don't get the final option to confirm its removal – the WiFi network is simply removed.
Step #5 – Exit System Preferences
Finally click OK and then click Apply.
How To Prioritize Wireless Networks in Mac OS X
Now instead of deleting a WiFi network, a better idea might be to prioritize your home or your work network which will prevent you from accidentally joining an unsecured network. That way you can still connect to your saved public WiFi networks if you wish to, but your Mac will choose your preferred network over any others.
Another way this could be useful would be to prioritize your personal WiFi hotspot. If you then choose to use your hotspot in a public space again, your laptop won't end up connecting to another (possible unsecured) public network.
Setting the WiFi network priority in Mac OS is very easy. Here are the steps:
Step #1 – Open Network Preferences
As above, click on the WiFi symbol on the top menu bar and click on Open Network Preferences at the bottom of the drop down menu.
Step #2 – Select WiFi in the network panel
In the network panel that pops up, select WiFi from the menu on the left and then click on Advanced at the bottom right of the window and ensure that the Wi-Fi tab is selected.
Step #3 - Click and drag to arrange in order of priority
Click on the WiFi network that you'd like to connect to as a priority and drag it to the top of the list. You can then do the same with the other networks and arrange them in order of priority.
Step #4 - Save changes
Finally click OK to save your changes.
Basically what happens is your Mac will try to connect to the first WiFi network on the list (if it's available). If the network isn't available, the next WiFi network in the list will become the top priority and so on.
If you plan to use your phone as a hotspot, then it's a good idea to set this network as the number one priority and move it to the top of the list.
Wrapping up
So there you have it.
Hopefully these tips will save you some frustrations whenever your Mac tries to connect to a WiFi network that you don't wish to connect to.
So to recap, you have two options, you can either delete the network altogether from the list or you can prioritize a particular network over the others.
Deleting or forgetting a network is useful to drop potentially dangerous public networks that are unencypted. It's also useful if your router has a flaky connection that keeps dropping out. For example, I have a BT Hub, and the 5 GHz band is very flaky at best, so I have dropped this to prevent automatically connecting.
A good tip could be to delete your iPhone hotspot, especially if you are limited in terms of data. If you don't, your Mac may try to connect to it just because it's the closest network in proximity.
Prioritising your network also serves a couple purposes. The first is that it will always choose to join your preferred network over another which saves you from having to disconnect and reconnect to your preferred network.
Secondly, it works as a security feature too, as your Mac will always choose your preferred network over a free WiFi network for example, which may not be secure (so long as your in range).
Do you you guys use any of these features? Do you think they should be more prominent and easier to find?
Cheers!