Its good to customize your computer and it's definitely good to have something nice to look at on your desktop background.
There's loads of websites out there offering desktop backgrounds such as this one and this one, but have you ever noticed just how nice the wallpapers are on your lockscreen?
The wallpapers shown on the Windows lockscreen are actually part of a feature called Windows Spotlight. The images are mainly taken from Bing and from the lockscreen, you can choose to either 'like' or 'not like' the images and the system will then begin to show you more of the images it thinks you might like in the future.
So for example, if you 'liked' images of nature, you will start seeing more of those on your lockscreen.
Now I think these images are awesome, trouble is they're exclusive to your operating system's lock screen, so how do you get to them?
Well some of these images are actually cached on your computer but they are hidden away and it's not obvious where they live. In this post, I'll show you where they are, so you can save one and put a nice image on your desktop background 🙂
Let's get cracking shall we?
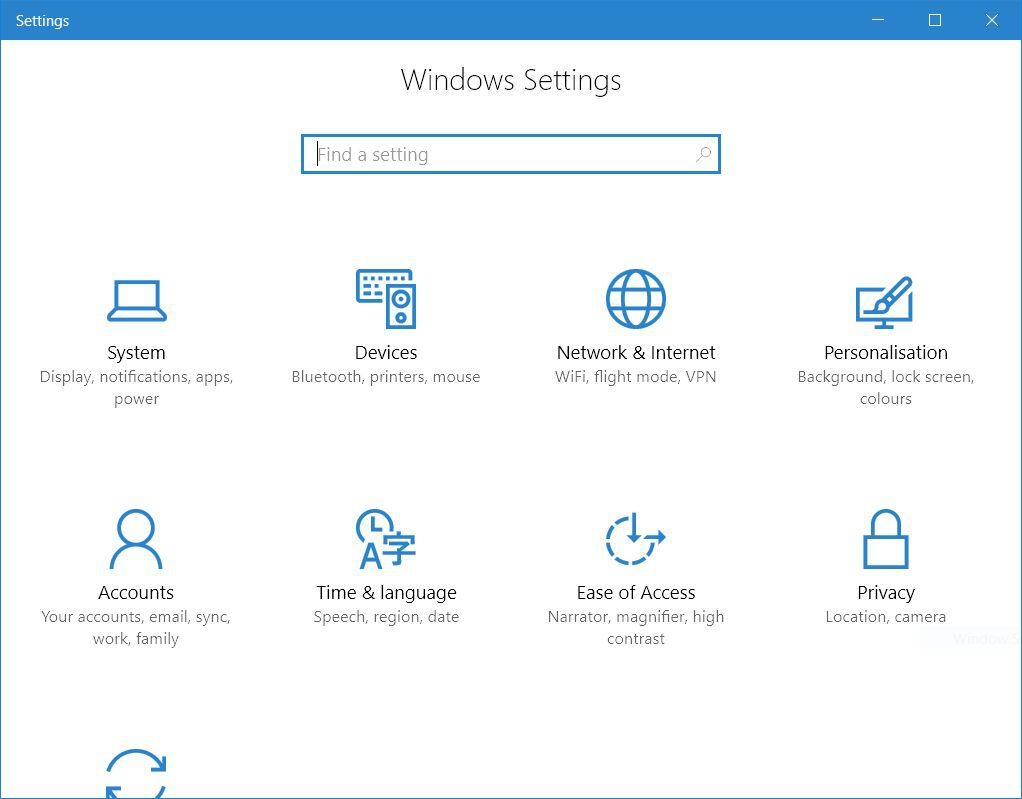
Step 1
Go to start and click settings. Once you're on the settings screen, click personalisation like in the image below.
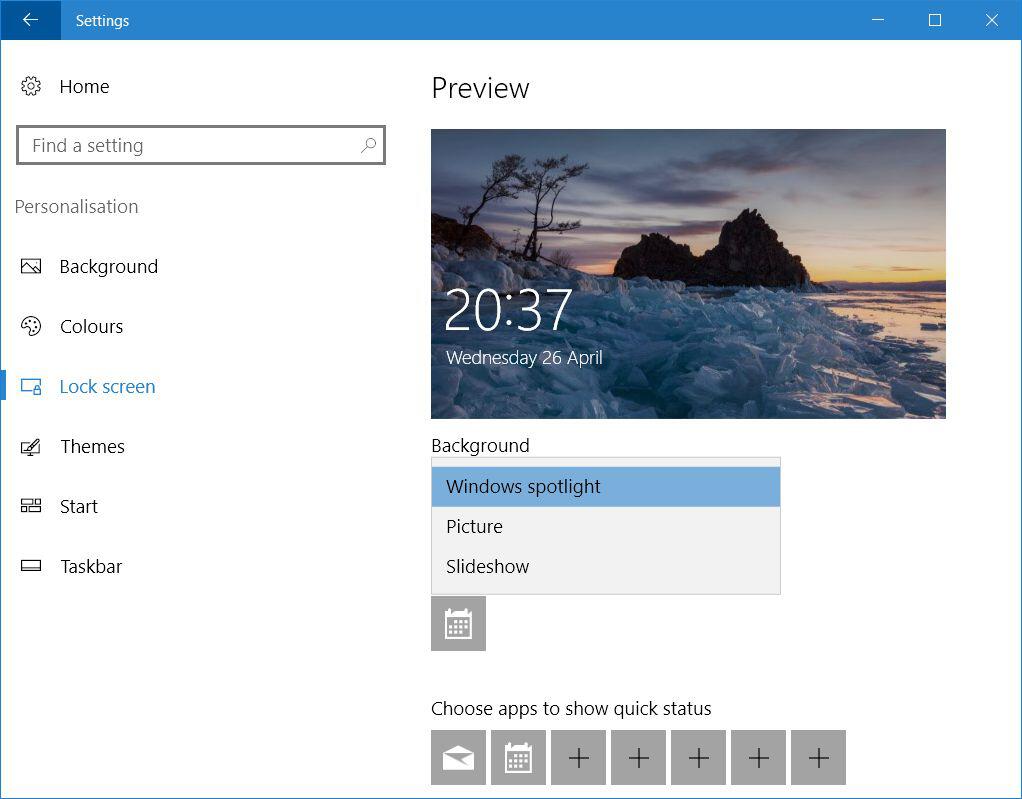
Step 2
Select Lock screen on the left hand side and then select Windows spotlight from the drop down menu just below where it says Background. Above it, you'll see a preview of the type of images you'll be shown on the lockscreen.
Step 3
You can test that the above has worked, just by going to the lockscreen. A quick way of doing this is to press Windows Key + L.
It might take a few minutes to load an image (depending upon the speed of your internet connection). The first time you ever switch on Windows Spotlight, there will be delay as Windows retrieves the images from Bing's servers. But as time goes on, Windows will save up these images.
Like I mentioned above, when you're on the lockscreen and images start being displayed to you, you'll sometimes see a text box that asks you "Like what you see?". You can either choose, "I want more!" or you can choose "Not a fan". Windows will then learn your preferences as it goes along and adjust itself to your tastes.
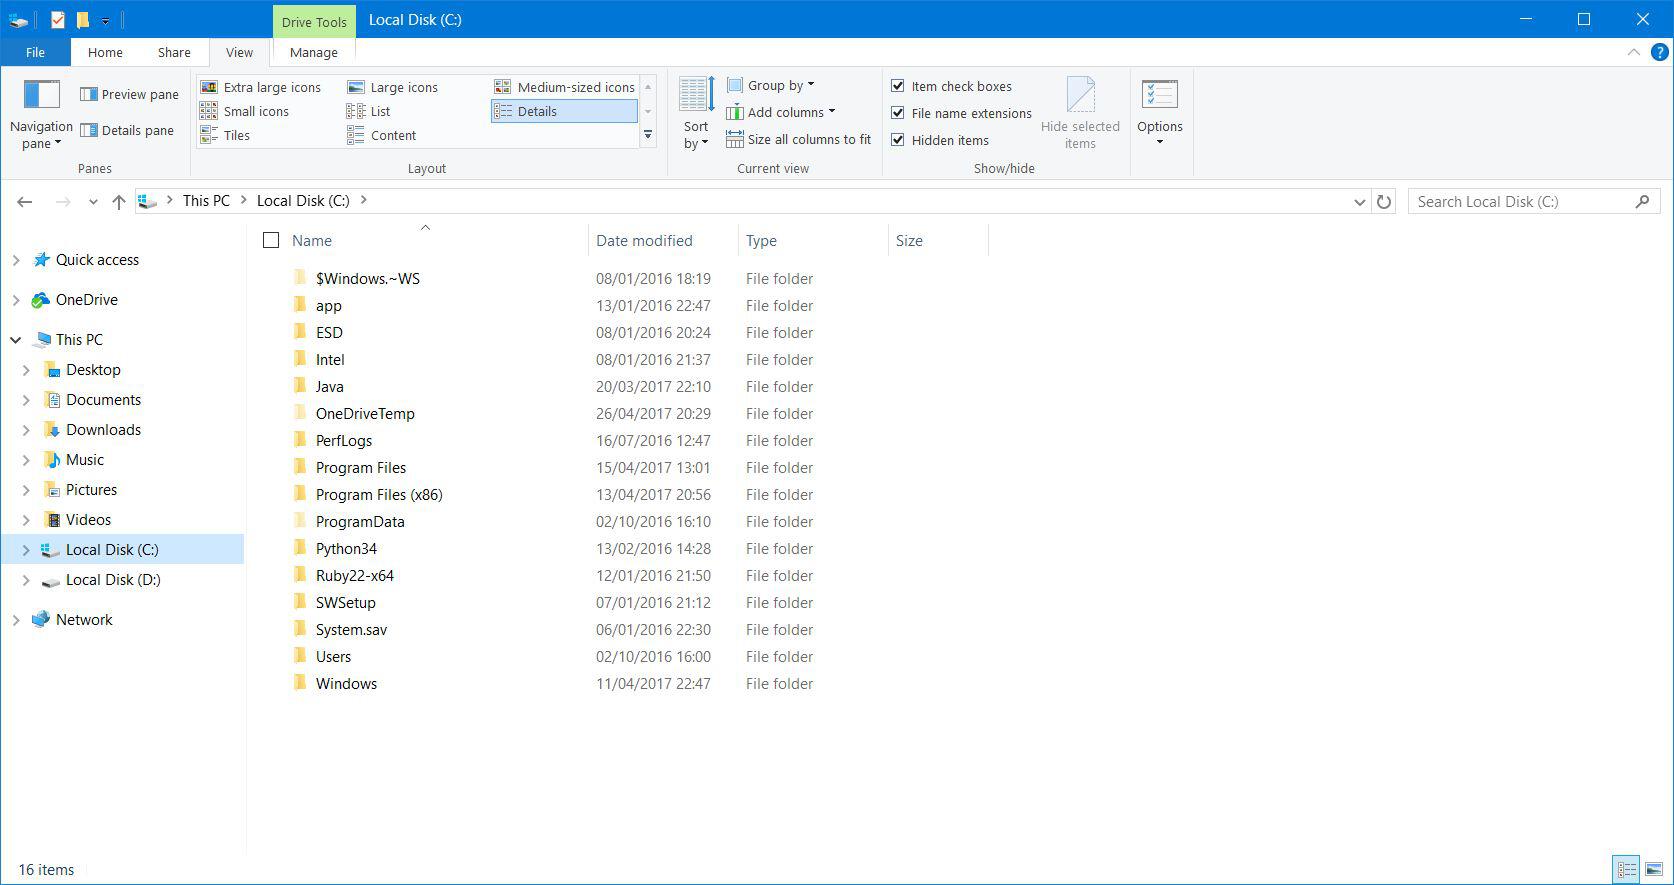
Step 4
Next we will find out where those images are cached so that you can make one of them your desktop background.
First of all, go to file explorer and click on View and then tick the Hidden items checkbox.
Step 5
Navigate to the following location in Windows explorer, replacing "<username>" with your own username.
C:Users<username>AppDataLocalPackagesMicrosoft.Windows.ContentDeliveryManager_cw5n1h2txyewyLocalStateAssets
So, in my case it would be
C:UsersbarryAppDataLocalPackagesMicrosoft.Windows.ContentDeliveryManager_cw5n1h2txyewyLocalStateAssets
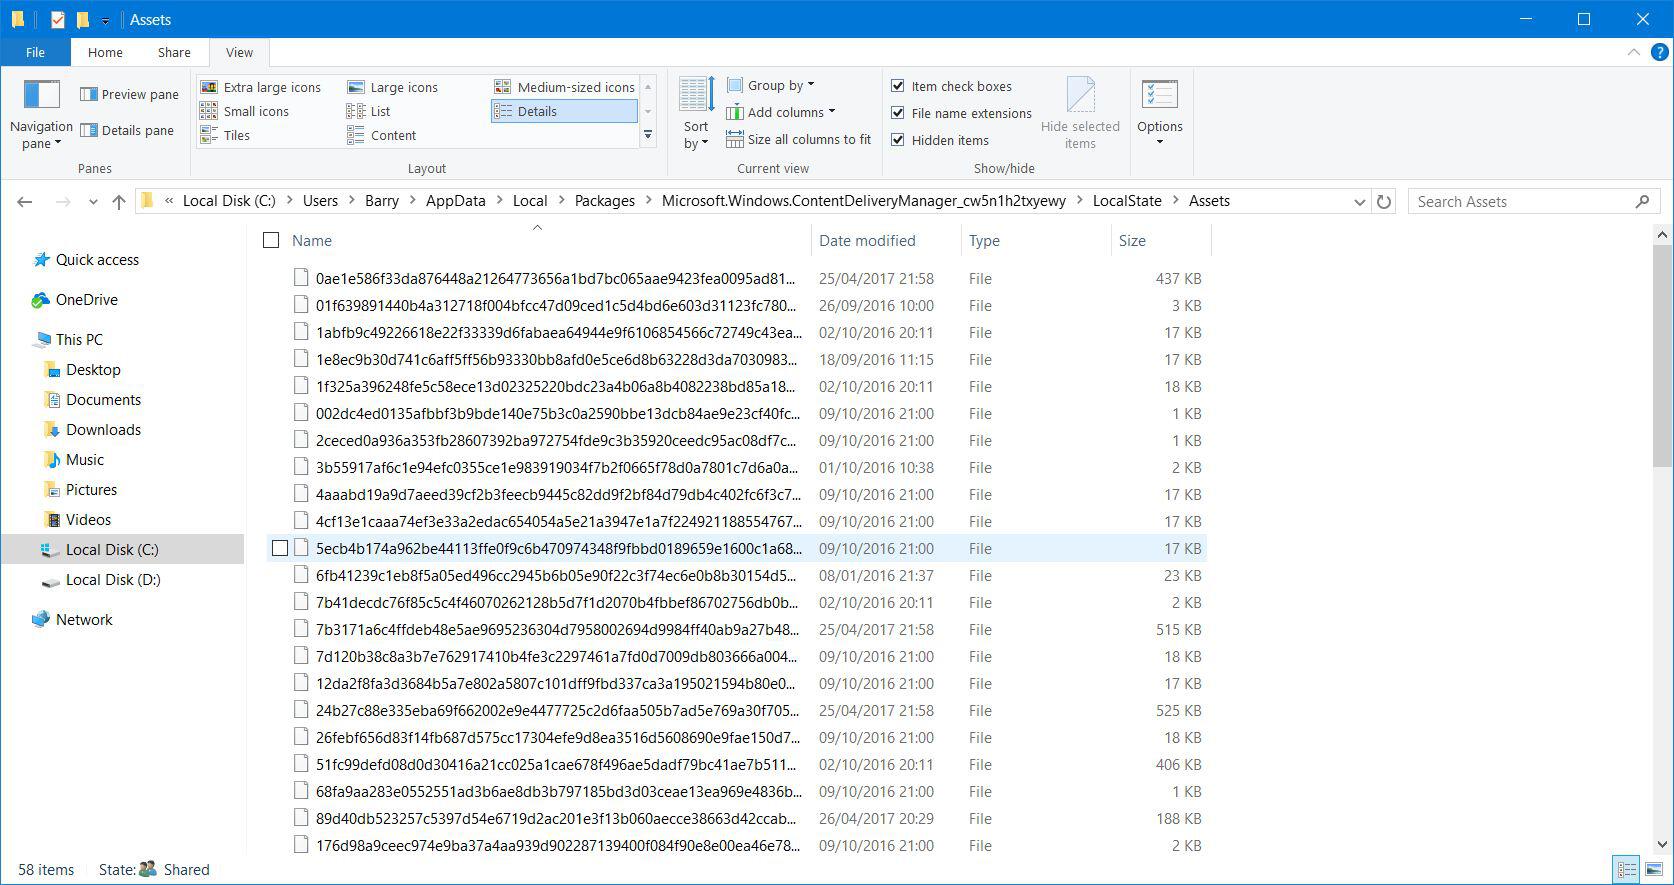
Now what you will see in the Assets folder is a bunch of crazy looking files, each with a seemingly random name consisting of letters and numbers. Some of these files are images, others aren't.
What you want to do next is create another folder somewhere and then copy them to that new folder. Select them all using CTRL+A. Then copy using CTRL+C and finally use CTRL+V to paste them into your new folder.
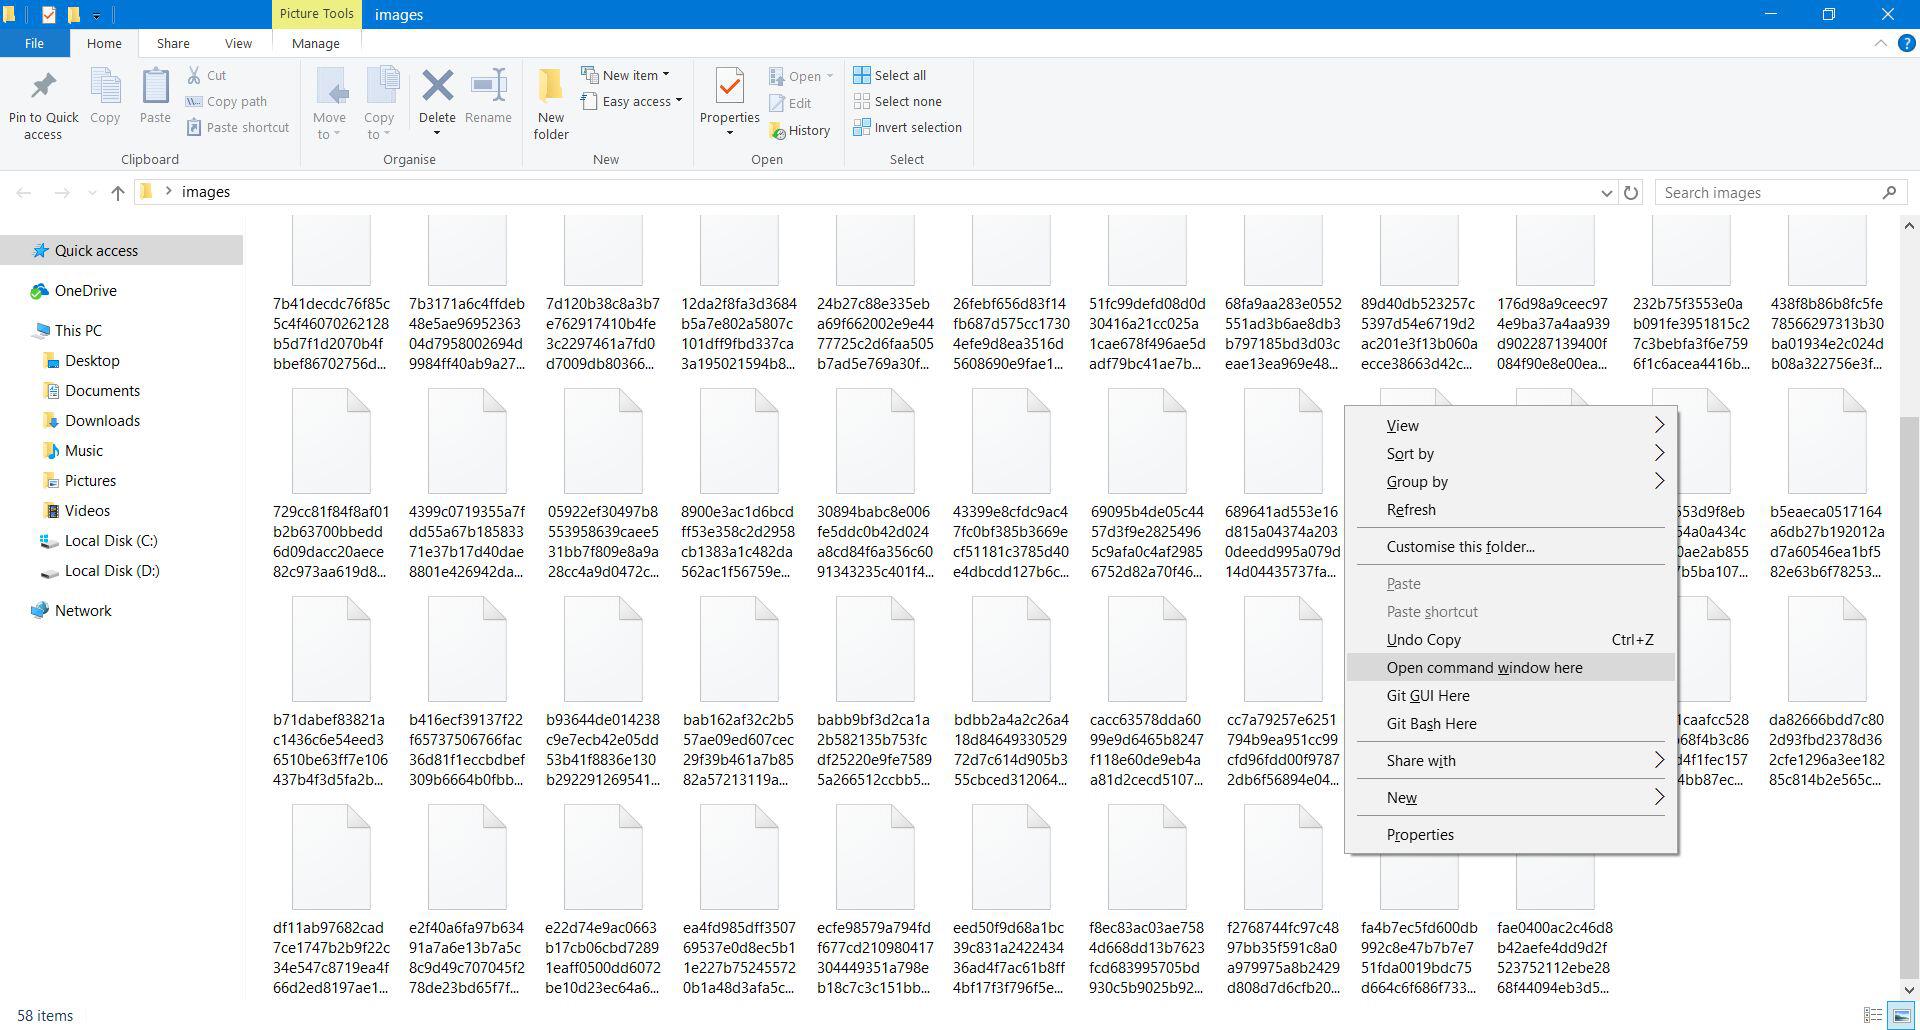
Step 6
So we can actually see these images, we need to apply a proper image extension to each of them. To do this you can just right click on an image, select rename and add ".jpg" to the end of the filename, but if there's a lot of them, we can rename them all at once using the command line.
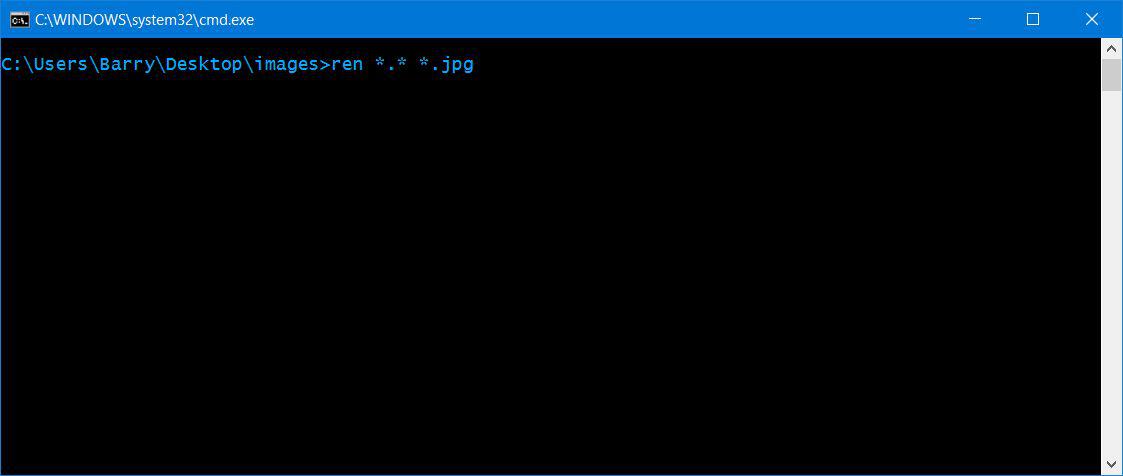
In your new folder, hold down Shift and right click in a blank area (not on one of the files). Select "Open command window here". Once the command window is open, run the following command which will rename all files to jpegs.
ren *.* *.jpg
Step 7
Close the command prompt and refresh the folder using the F5 key. Some of the files will have thumbnails, others won't. You can now go ahead and copy the files which have thumbnails to where you normally keep your wallpaper images.
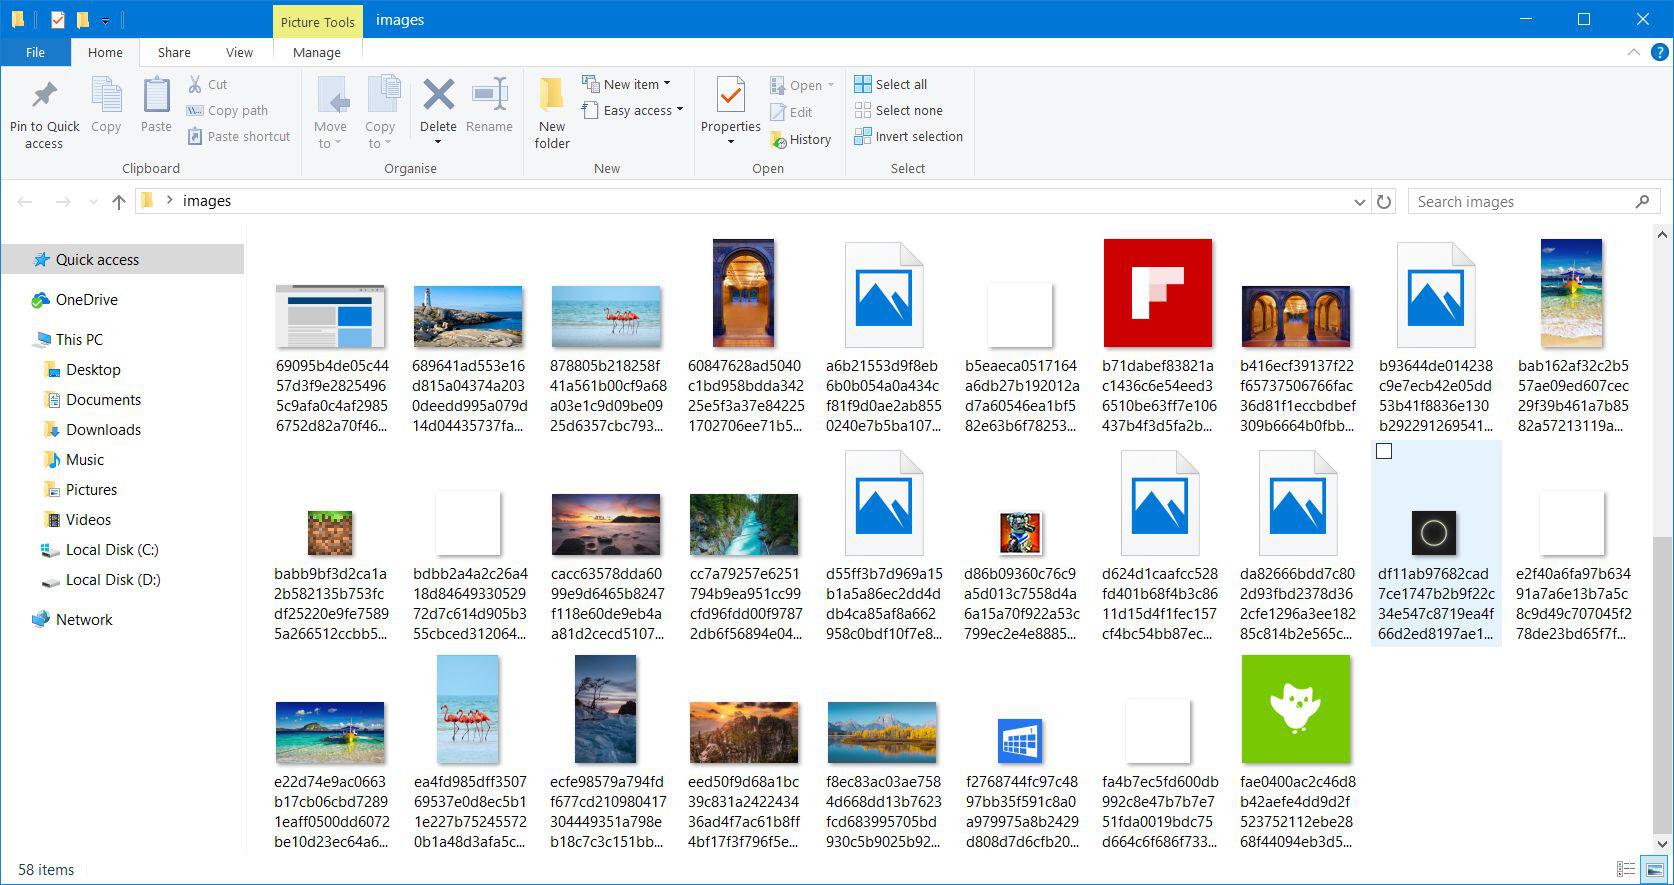
Feel free to bin off those files without thumbnails and the small images (such as icons etc). What you want is the widescreen images, as they'll look good on your desktop, or you can use the portrait ones on your smartphone if you like.
There you go, enjoy your new wallpapers!
Cheers!